How to sharpen steel knives

A sharp knife is essential in any kitchen, whether it's in a professional restaurant or a vacation home.
Buying a sharp knife is only half the battle; you must also maintain its sharpness over time; otherwise, buying a new knife every month or so will become a habit.
So, “how to keep a knife sharp?” You might wonder. Sharpening a kitchen knife on a regular basis is the best way to keep it sharp for a long time. Now, you don’t have to collect all your kitchen knives and take them to a knife sharpening place every week. And since the knife sharpening man is almost not a thing anymore, you can do it for free at home.
Knife sharpening may appear frightening when performed by experts, particularly chefs on television, but you can do it yourself if you read our tutorial thoroughly and exercise caution.
Today, we'll go over all you need to know about sharpening steel knives, particularly because they require a lot of upkeep, as many chefs assure us.
1. The pull-through method
There are 3 effective methods for sharpening a knife. The first one is the pull-through method, which is also the first method of our guide. This is a relatively quick, easy and safe method, therefore, perfect for beginners. It requires a sharpening tool with either V-shaped or ceramic wheels.
The concept of this featured sharpener is fairly simple. The whole process is manual; You run your dull steel knife about 3 or 4 times through the coarse slot by pulling the knife towards you and never backward. It is very important to remember that you need to sharpen the knife in one direction only with this sharpener. And then, run it twice through the fine slot to remove burrs and voila; your knife is as sharp as the day you bought it.
This sharpener is perfect for you even If you have a collection of kitchen knives that are in many different shapes and sizes.
Some pull-through sharpeners have multiple grits. Some handhelds require you to pull the sharpener along the knife blade, instead of the knife through the sharpener. But no matter which you have or you want to buy, it is going to be a very easy process that you can do once every three months at home, depending on the knife.
2. The whetstone method
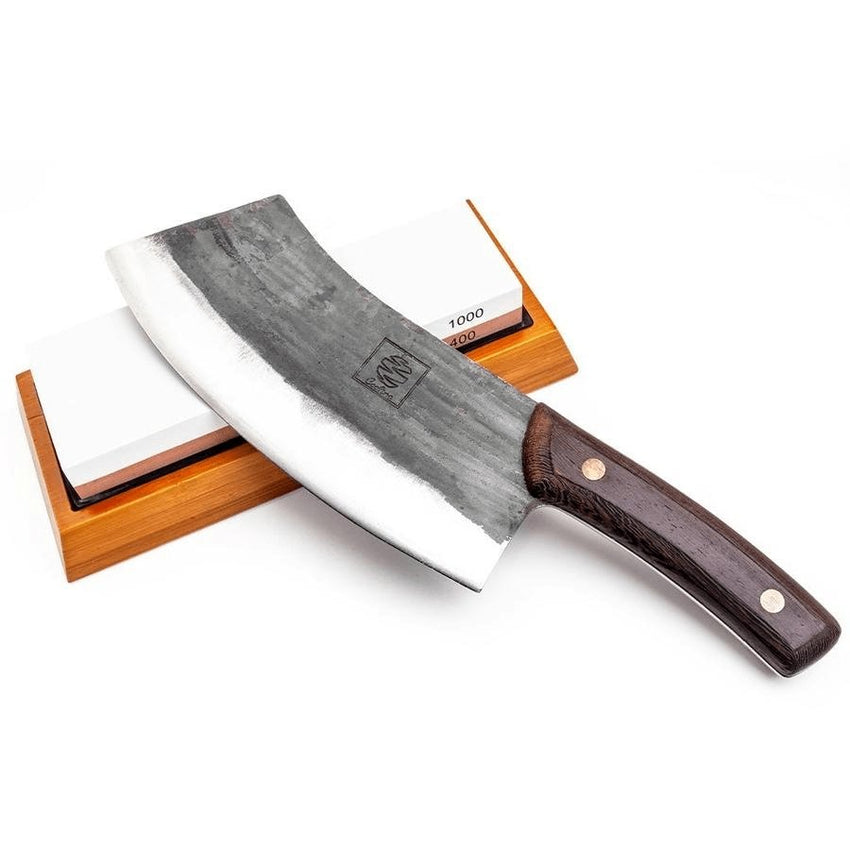
A whetstone or a Waterstone is essentially a rectangular block of stone used to sharpen and hone the edge of a knife. This method requires more effort and even more practice but when you become good at it you will know that it’s worth it. It is especially great for bigger chef knives and, to be honest, for all sizes of kitchen knives.
Whetstones come with different grit counts, indicating the level of coarseness. Around 1,000 grits is perfect for sharpening a knife. Some whetstones come 2 grits. This tool makes sharpening with this method much easier.
So now, when you have your whetstone, you will need a more detailed guide for using it because as we have stated previously, this method is not the easiest.
-
Prepare the stone: Soak the stone in water for around 10 minutes, until it absorbs the water and a liquid film appears on the surface. After that, splash some water on top of it, and feel free to re-splash during the sharpening process if it ever gets too dry. After that, position the stone on something solid and smooth, so it doesn't move about during the process. You can place it on a tea towel on the table. The stone should be roughly perpendicular to your body or slightly to the right if you're right-handed.
- The sharpening: This is the hardest part yet the most rewarding. You will need to grip the knife in your dominant hand, holding it at a 45° angle across the stone with the edge facing yourself and the knife's heel pointing towards your belly. The hardest part is getting the angle at which you will sharpen the edge of the blade. A great test is to get roughly half an index finger's gap between the spine of the knife and the stone. Now very gently apply some pressure to the middle of the blade with your left hand. Starting at the tip, glide the blade up and down the stone—around five strokes up and down is good. Then move to the middle—five more strokes. Finally, five strokes up and down on the heel. Now you need to sharpen the other side, but remember to not swap the hand gripping the blade. Lead with the heel this time, rather than with the blade, but repeat the process in three parts. After five strokes on each third of the blade and check the blade. But if you sharpen your knife regularly, just take a few strokes will probably be enough.
- Clean the burr: Burr is a tiny whisper of metal left on one side of the blade. When you can feel one smooth and one scratchy side to the edge that means you have a burr on your knife. Grab a fibrous tea towel or some newspaper and do the same motions of sharpening with it. After that, you will need to check the sharpness of your knife. To do that, you will need to hold a piece of newspaper at about 45° and slash it lightly with each point of the blade. If the blade cuts through easily, your knife's sharp and ready to go.
- Polish the blade: You will need to swap over from the coarse grit to the finer grit and make sure this side is wet, too. The motion is exactly the same as with sharpening, but you can apply slightly less pressure, and limit to roughly 30 strokes on each side and you will have a freshly sharpened blade. Clean your knife with a dry cloth and get back to using it as you did before.
3. The honing steel method

Using a honing rod in between sharpening will keep your knives from degrading and the actual sharpening won’t be too hard.
It will also keep you from using whetstones regularly, which can shave metal from the edge of your blade, reducing the knife's lifespan. Honing rods are not meant for sharpening old and blunt knives, they are meant to be used in between sharpening and for keeping your blades fresh. If you take care of your knives you will not need to sharpen them so often.
A honing rod realigns the metal in a blade, massaging small nicks, indentations, and flat spots away. It doesn’t remove any significant amount of metal from the blade of the knife and gives longevity to the knife.
Here is a step-by-step guide on how to use a honing rod:
- Hold the honing rod in your non-dominant hand, held at a comfortable angle facing away from your body with the rod tip elevated above its handle.
- Hold the knife firmly in your dominant hand with your four fingers holding onto the handle, while your thumb is placed on the spine of the knife, far from the blade edge.
- Hold your knife at approximately 20° in relation to the honing rod. Your angle doesn't need to be exact, just approximate and you need to make sure to maintain the same angle throughout the honing process. Because changing the angle used during the honing process won't smooth out the metal.
- Move the knife across the top half of the honing rod while maintaining a 20° angle. Start a motion with the heel of the knife touching the rod and end it with the tip of the knife touching the rod. Move your arm, your hand, and your wrist. Pay attention to moving the wrist to get the movement right because without moving the wrist, you won't be able to sweep the entire blade — heel to tip — across the honing rod.
- Move the knife across the bottom half of the honing rod while maintaining a 20° angle. Gently move the knife across the lower half of the rod using the same sweep of your arm, hand, and wrist. You will need to use only as much pressure as the weight of the knife. After completing both a top- and bottom sweep, you are all done.
Another thing that you can do to prevent your knives from getting blunt quickly is removing rust. That is why you have to know how to clean rust from a kitchen knife.
In Conclusion: Whichever method you choose, as a beginner, you might need a couple of tries to learn how to sharpen steel knives properly. But as a one wise saying states; “Only through practice and more practice, until you can do something without conscious effort”.


